
Screen Overview
- Top-left "Map Center": Shows the coordinates at the center crosshair. Tap to expand and see WGS84, degrees-minutes-seconds, TWD97, and UTM 51N coordinates, as well as GPS altitude and magnetic declination.
- Red Crosshair: Map center. Used as the reference point for adding waypoints and querying weather.
- Blue Grid Lines and Numbers: Coordinate grid lines that can be toggled in layer settings.
- Bottom-left Scale Bar: Current map scale.
- Blue Dot: Your current location.
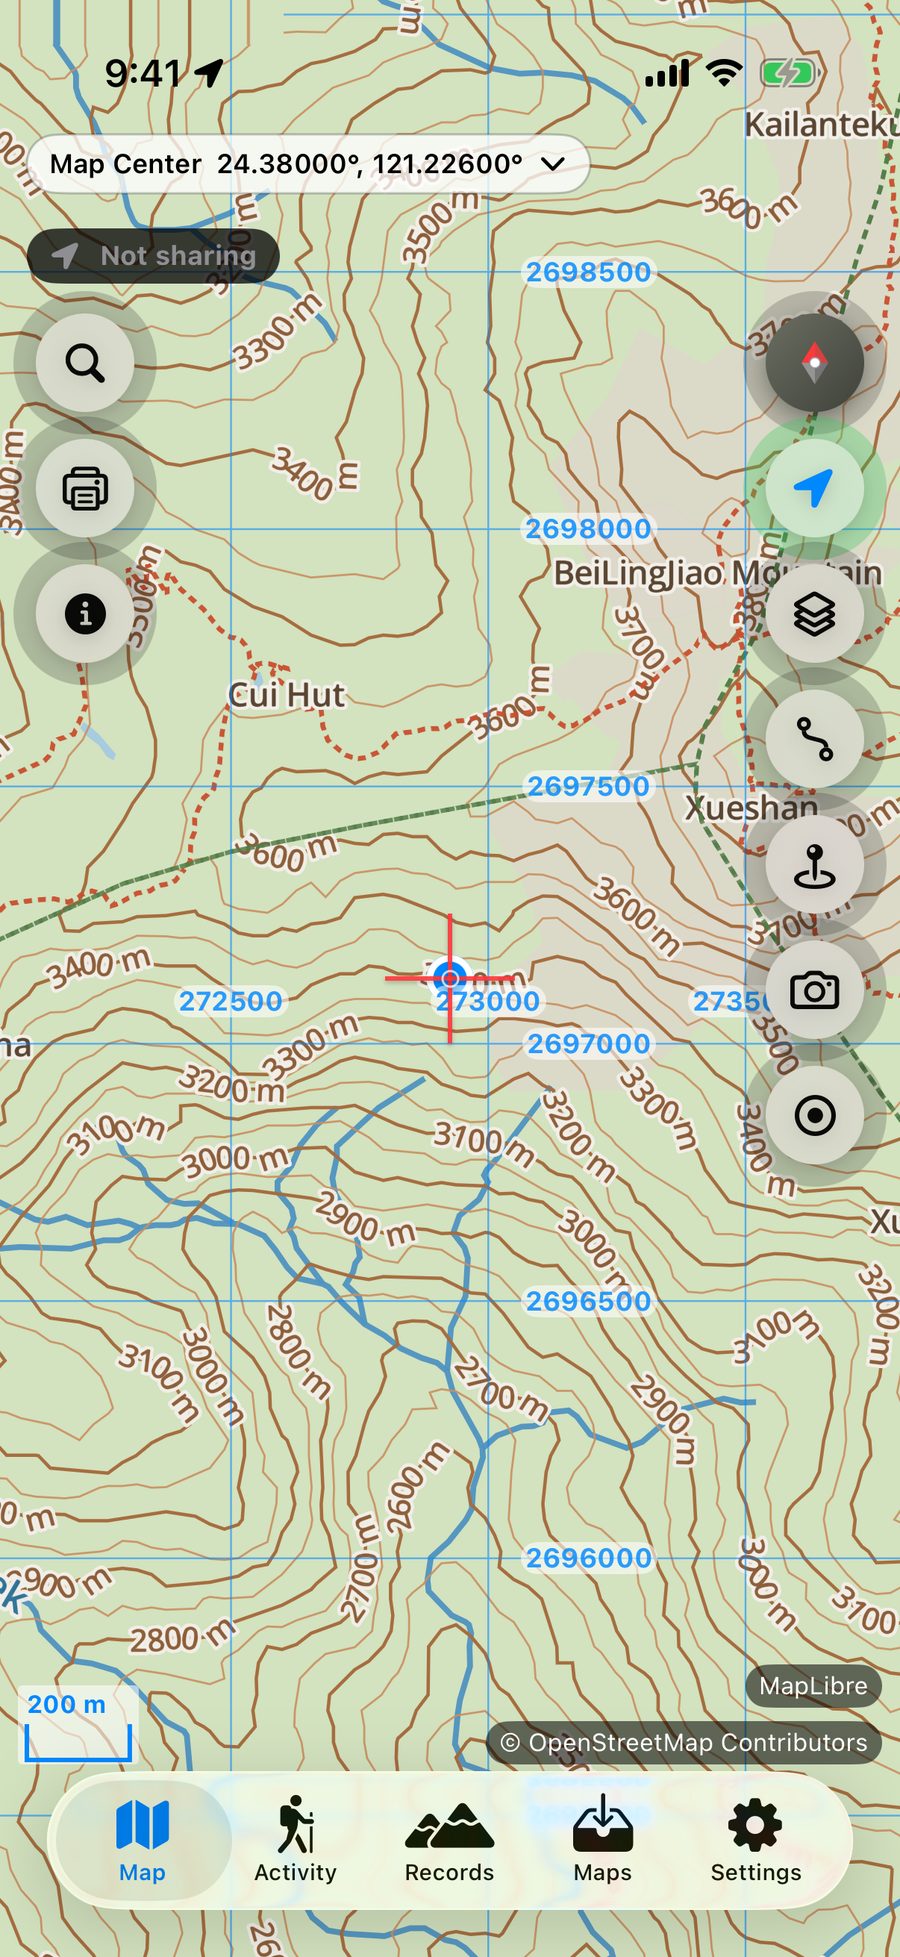
Map Button Icons Reference
Explained from top to bottom on the right side, then top to bottom on the left side. Some buttons only appear under specific conditions, for example the layer button only appears when using vector offline maps.
-
 Compass (North Lock)
Rotates with your direction of travel. Tap to lock the map facing north for easy comparison with paper maps.
-
 Locate
Tap to cycle through "Off → Follow → Follow and Rotate". The map centers and updates with movement and rotation; long press to stop locating.
-
 Layer Settings
Open layer settings to toggle various layers, coordinate grid lines, and scale bar.
-
 Import GPX
Select and import GPX files as routes. Free version has a monthly import limit.
-
 Add Waypoint
Add and name a marker at your current location (or map center if not locating), for easy finding or sharing later.
-
 Take Photo
Open camera to take a photo. When recording a track, it attaches to the current track; when not recording, it attaches to the currently loaded GPX route. Requires locating first.
-
 Start Record / Stop Record
Start or stop track recording and display real-time status on Dynamic Island and lock screen. Pause and resume buttons appear during recording.
-
 Search
Find a location and jump to its position on the map. Free version has a monthly search limit.
-
 Print Map
Select an area and generate a PDF of that region for printing or sharing; requires offline map enabled first.
-
 Info
InfoExpand the info panel to see your current location, departure checklist, sunrise and sunset times, weather, and safety location card.
Locating and Tracking Modes
- Tapping the locate button for the first time activates GPS and enters "Follow": map always centers on your location.
- Tap again to enter "Follow and Rotate" mode; the map rotates to match your direction of travel.
- Tap again to turn following off. You can move the map freely; GPS continues running.
- Long press the locate button and select "Stop Locating" to completely stop GPS to save battery.
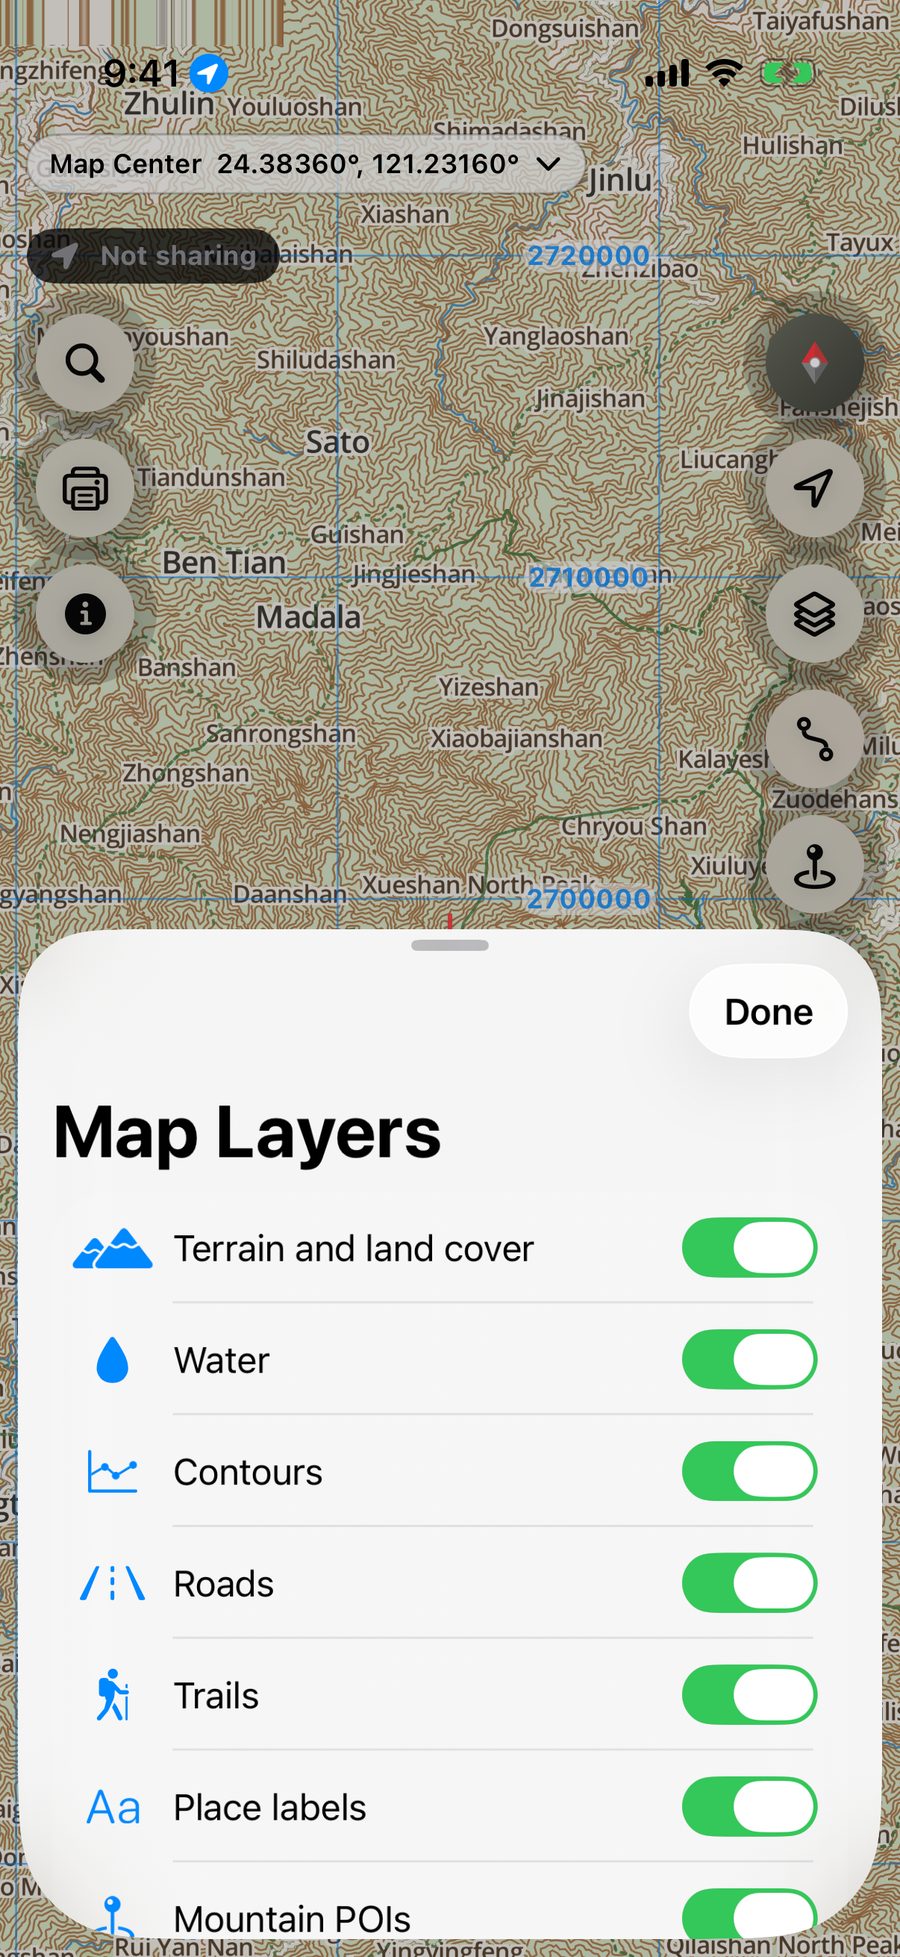
Map Layers
- You can individually toggle terrain and land cover, water and waterways, contour lines, roads, mountain trails, place names, mountain POIs, buildings, protected area boundaries, slope shading, plus navigation routes and recorded tracks. You can also toggle all layers at once.
- Layers not supported by the current map data will be automatically disabled. For example, the lightweight version map data does not have slope shading or building details at maximum zoom.
- Coordinate grid lines and scale bar can be toggled independently.
Coordinate Format

Need an answer? Visit Support & FAQ. The guide follows the latest app version; screens may differ.