
Browsing by Peak
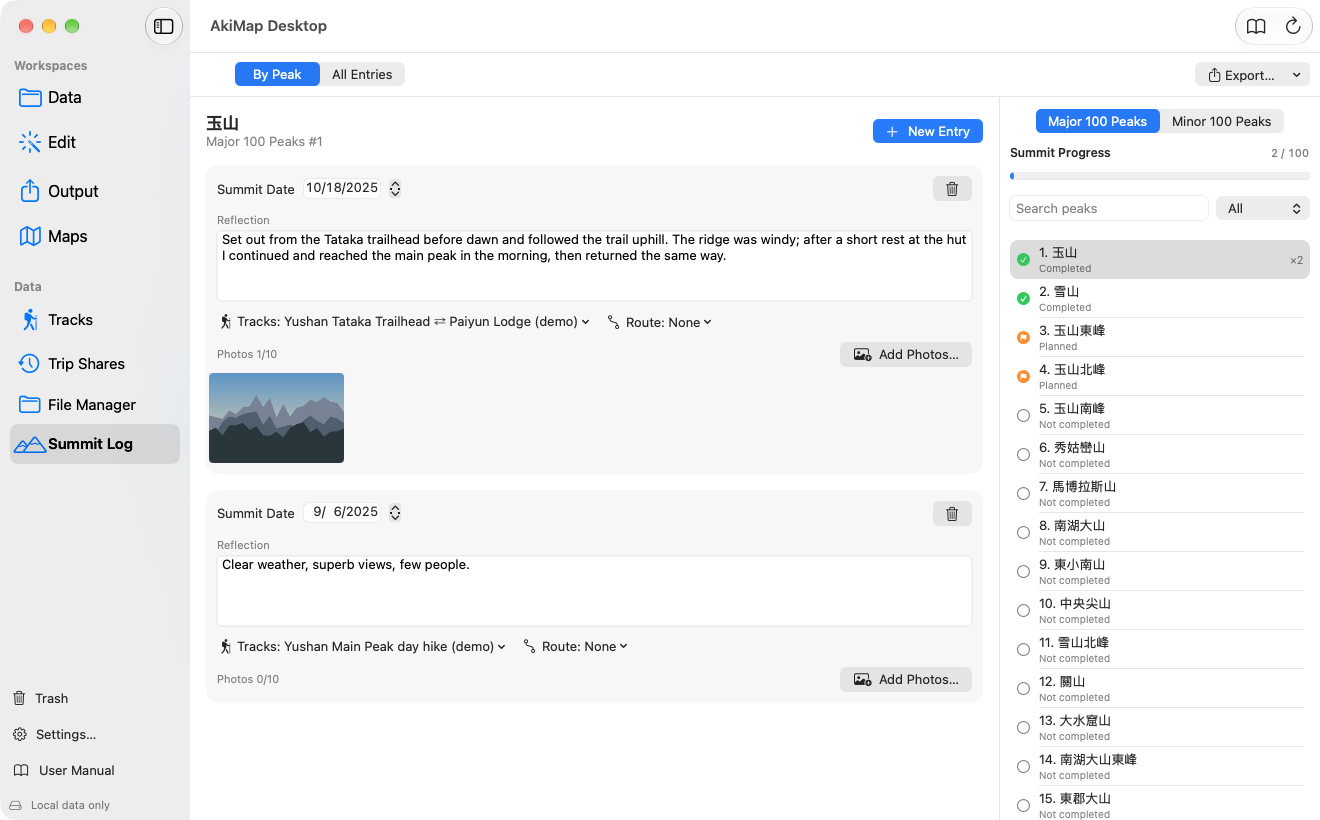
The right side lists the peaks. Switch between Major and Minor 100 Peaks at the top; each row shows the rank, name and state (Completed, Planned, Not completed), plus the number of ascents for completed peaks. Filter with the search field or the state menu. The progress bar shows how many peaks you have done.
The left side shows every entry for the selected peak. For each entry set the summit date, write notes, link the track you actually walked or a planned route, and add up to 10 photos.
Adding and Editing Entries
- Select the peak in the list on the right.
- Click “New Entry”; a new entry dated today is added.
- Change the date and type your notes; they are saved automatically when you leave the notes field.
- Use the Track and Route menus to link the trip; tracks from the same day are listed first.
- Click “Add Photos…” to attach photos.
The trash icon at the top right of an entry moves it to the Trash; right-click an entry to duplicate it. A peak with no entries shows “Add Plan” beside its name; planned peaks stand out in the list, and the plan is cleared when you add an entry.
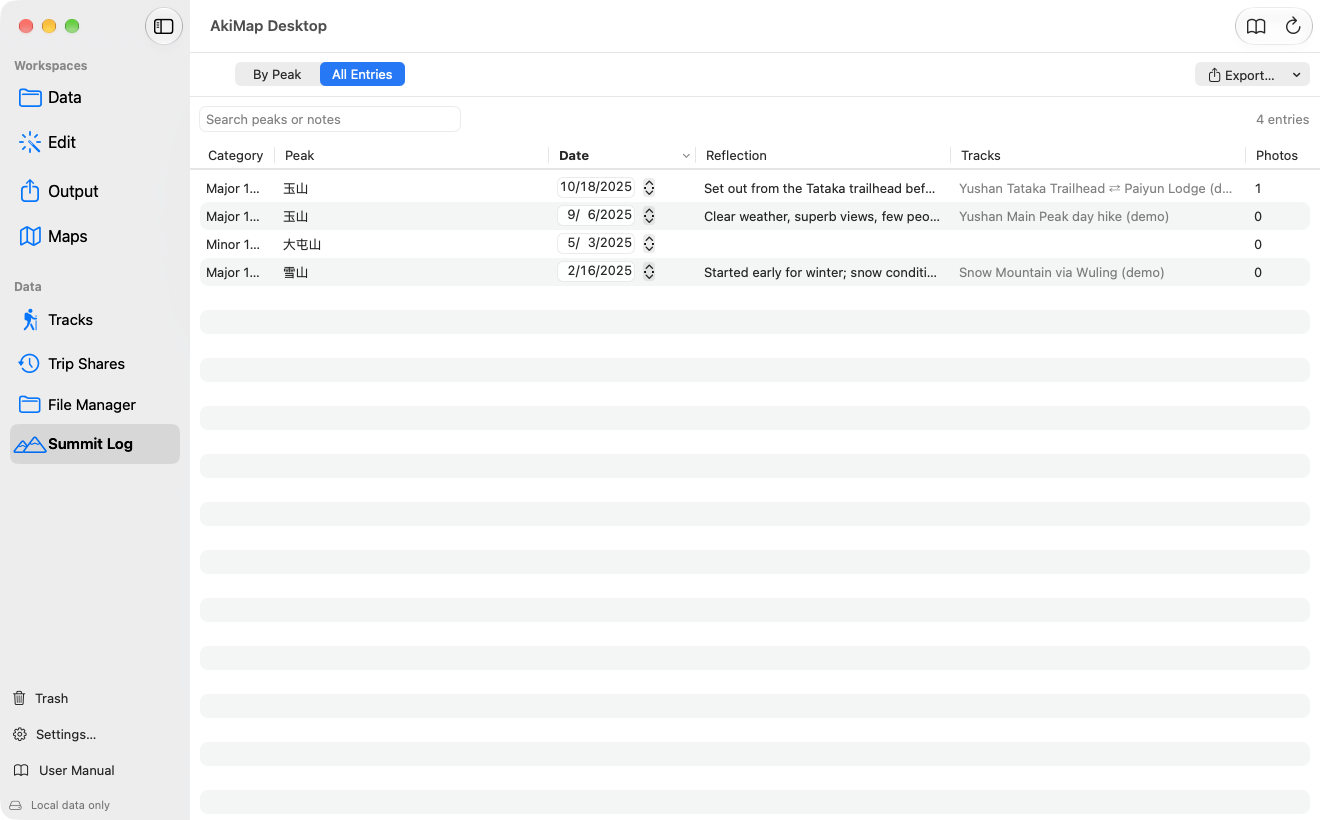
All Entries Table
Reports and Export
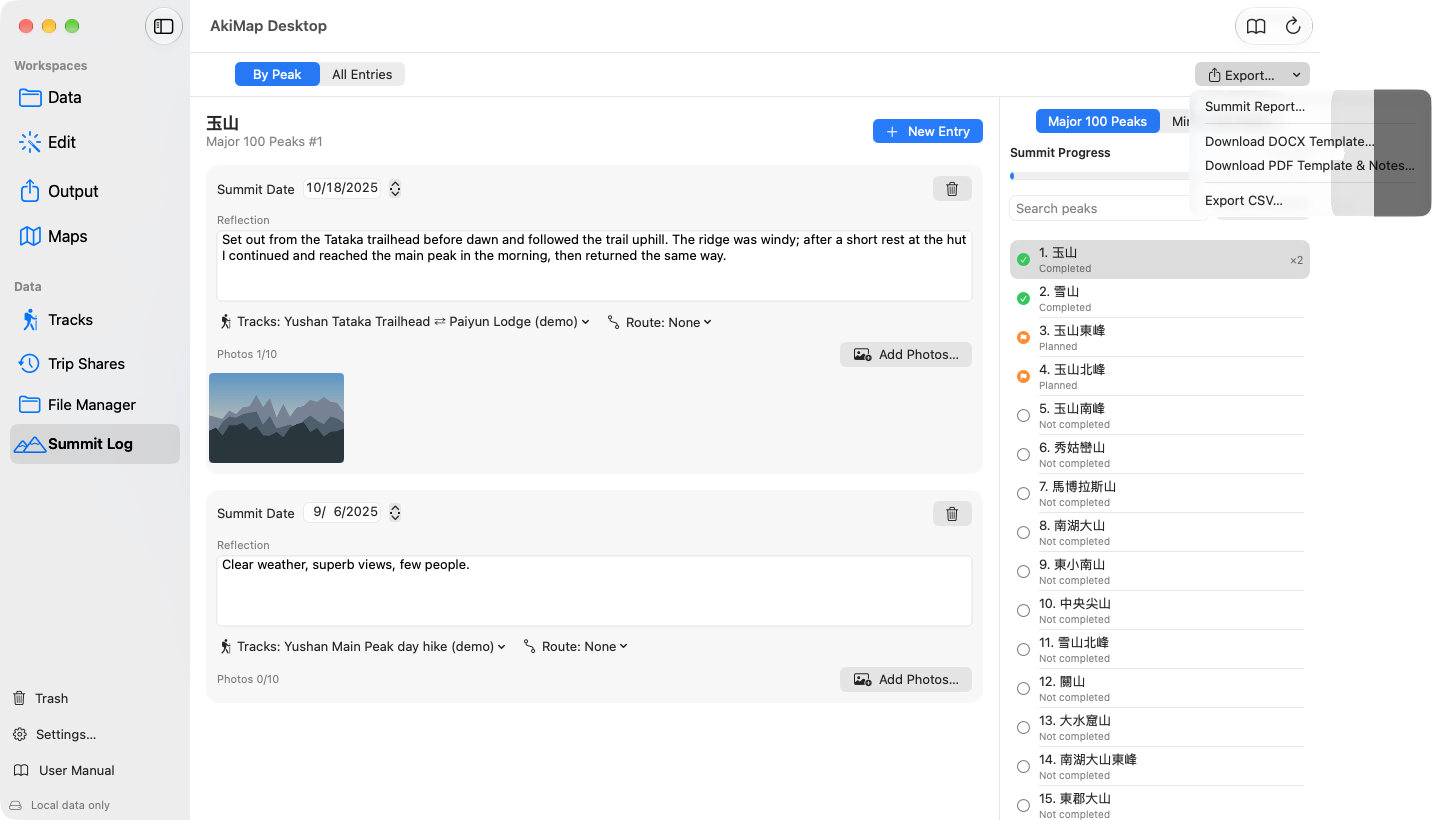
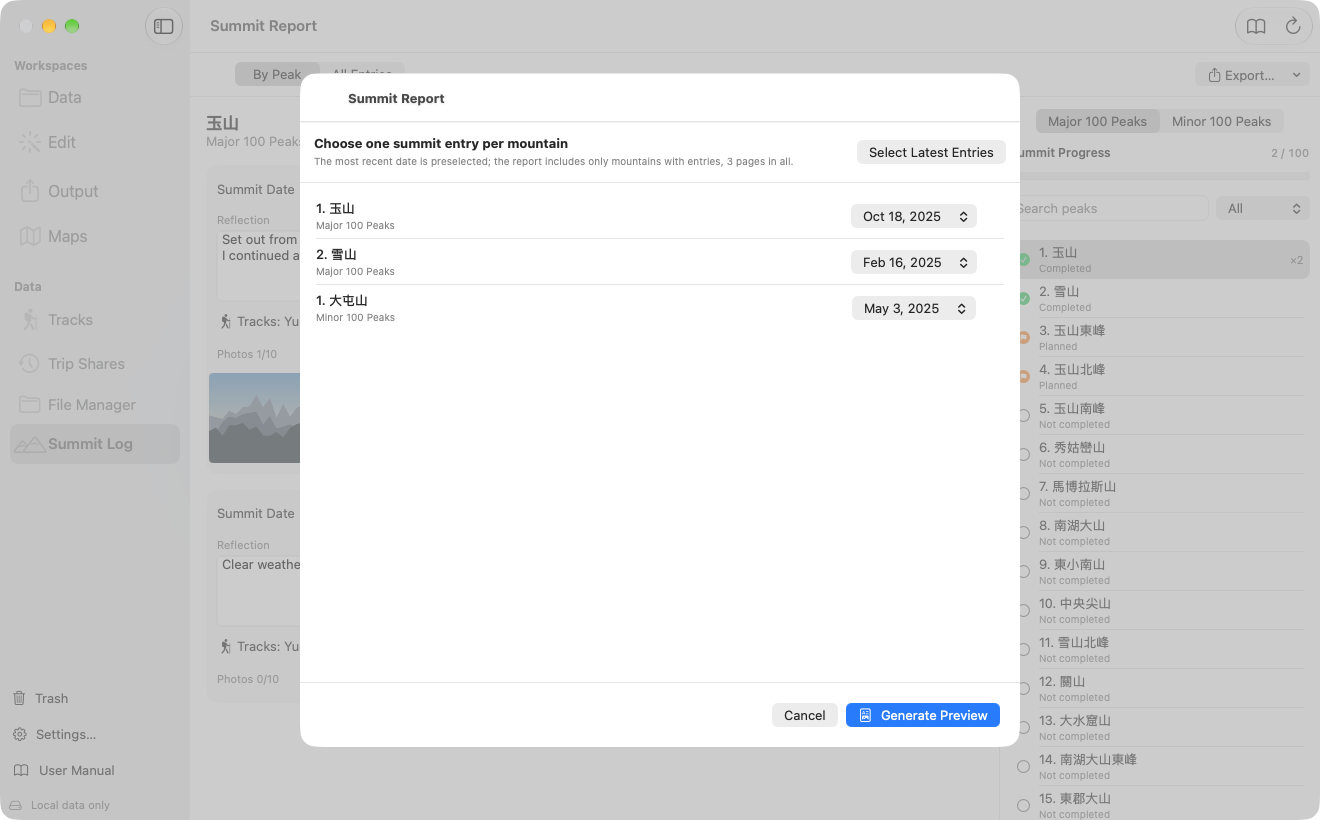
- Summit Report… creates a PDF with one page for each peak that has entries.
- Download DOCX Template… / Download PDF Template & Notes… save a blank fill-in template and data notes (the templates are in Chinese).
- Export CSV… exports all entries as a spreadsheet-friendly CSV.
- Choose Export ▸ Summit Report….
- For each peak pick the entry to include (the latest by default, or click “Select Latest Entries”).
- Click “Generate Preview”, check the result, then click “Save PDF…”.
Screens may vary by app version. See Support and FAQ if you need help. Support