
Editing the Replay
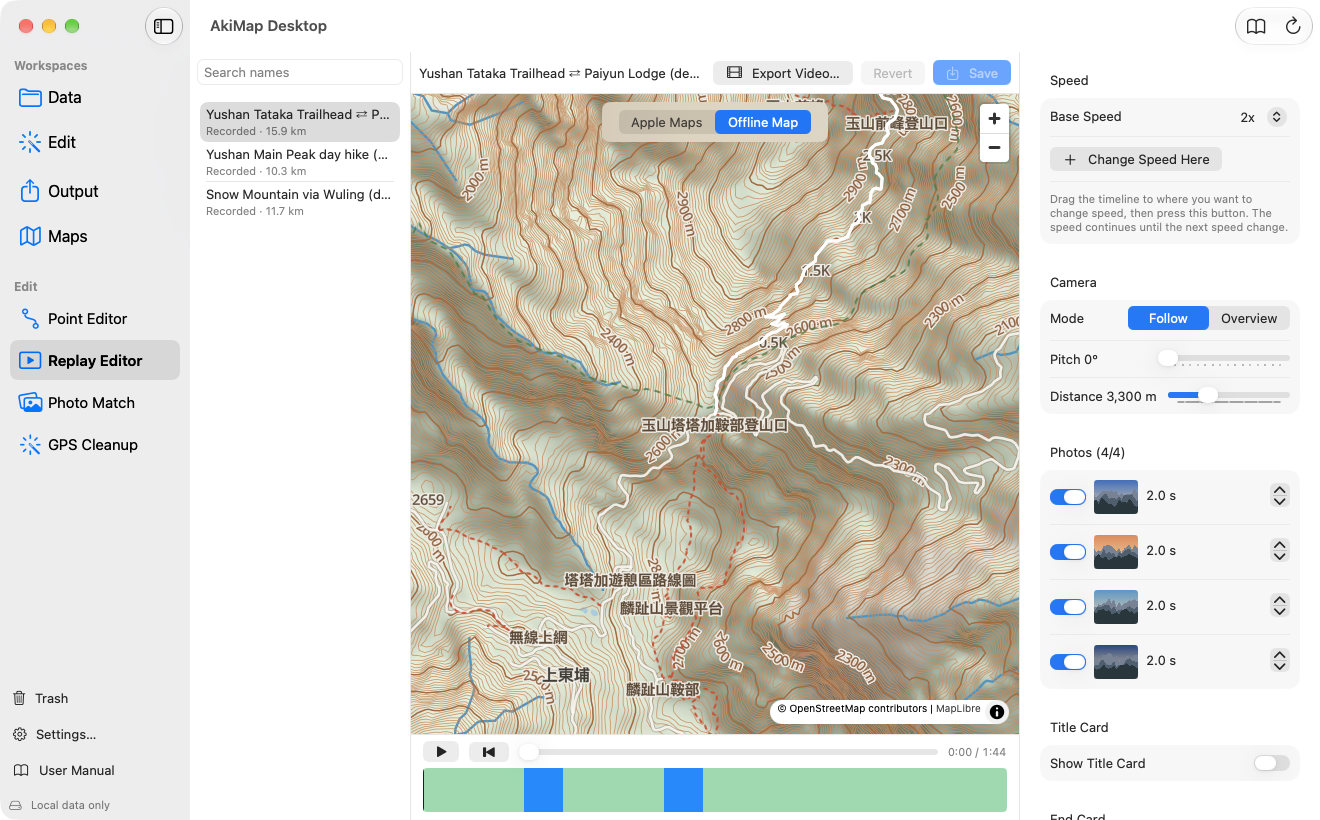
- Choose Edit ▸ Replay Editor and pick a track.
- The map on the left previews the replay; press Play, or click or drag the timeline to jump to any moment.
- Use the panel on the right for speed, camera, photos, title and end cards.
- Press ⌘S to save the settings; click “Export Video…” to render a video.
Speed
Base Speed can be 1x, 2x, 4x, 8x, 16x or 32x. To speed up or slow down one stretch, drag the timeline to that spot, click “Change Speed Here”, and pick a speed; it lasts until the next speed change.
Camera
- Follow keeps the camera on the current position. Adjust Pitch (0–75°) and Distance (500–10,000 m).
- Overview shows the whole route all the time; the map is fetched only once, so export is usually quick.
Photos
Photos on the track are listed under Photos: switch each one on or off and set how long it stays on screen (0.5–10 s). Click a thumbnail to jump to its moment.
Title and End Cards
Turn on “Show Title Card” and “Show End Card”, enter a title and subtitle, and set how long each stays (1–10 s).
Exporting the Video
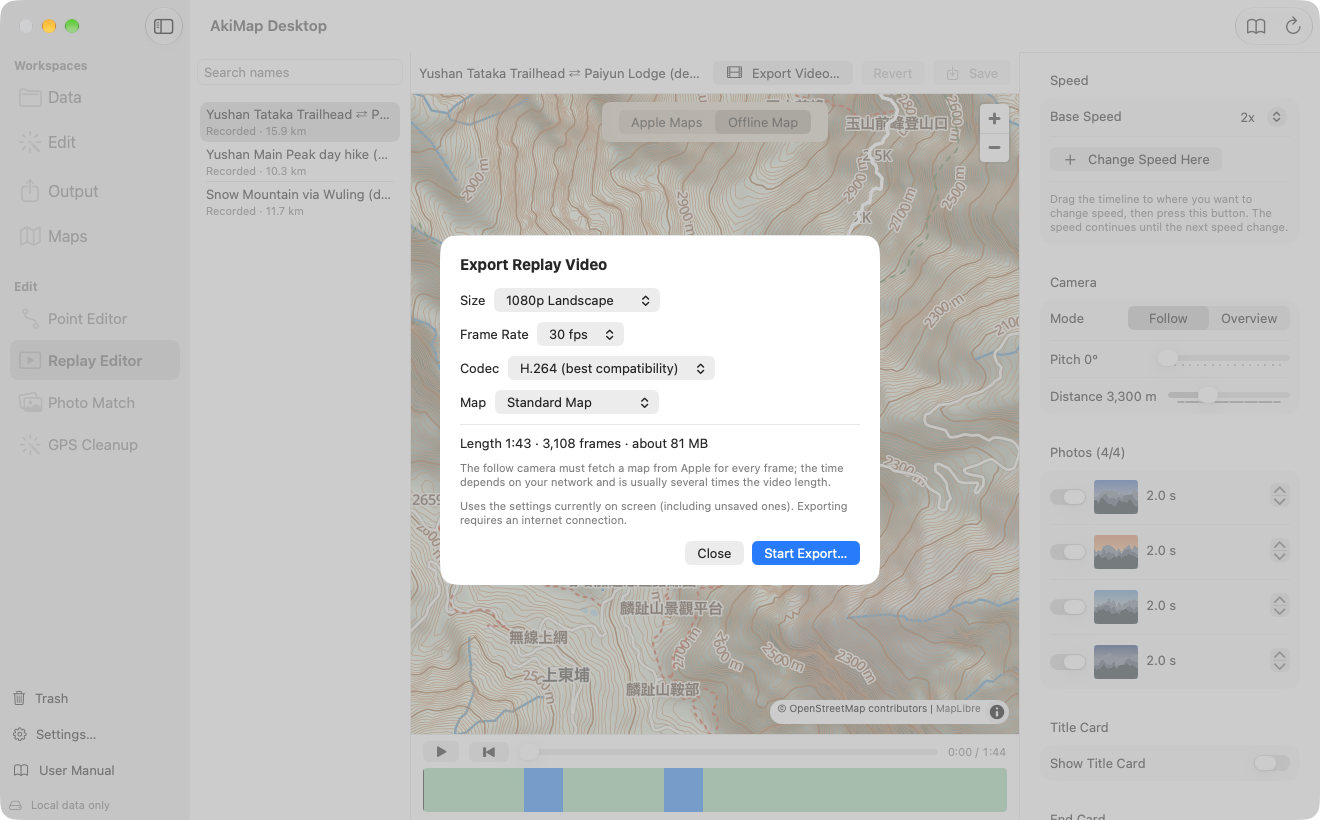
| Option | Choices |
|---|---|
| Size | 720p Landscape, 1080p Landscape, 1080×1920 Portrait, 1080×1080 Square |
| Frame Rate | 24 fps, 30 fps |
| Codec | H.264 (best compatibility), HEVC (smaller file) |
| Map | Standard Map, Satellite Imagery, 3D Satellite Terrain |
Size
Choices:720p Landscape, 1080p Landscape, 1080×1920 Portrait, 1080×1080 Square
Frame Rate
Choices:24 fps, 30 fps
Codec
Choices:H.264 (best compatibility), HEVC (smaller file)
Map
Choices:Standard Map, Satellite Imagery, 3D Satellite Terrain
- Click “Export Video…” and set the four options; the dialog estimates length, frames and file size.
- Click “Start Export…” and choose where to save.
- Progress and remaining time are shown; click “Cancel Export” any time and no file is left behind. When finished, click “Show in Finder”.
- Export uses the settings on screen, including unsaved ones.
- It needs internet because every frame's map is fetched from Apple; a follow camera usually takes several times the video length.
- The camera's Pitch only applies to “3D Satellite Terrain”; other map styles are rendered top-down.
Screens may vary by app version. See Support and FAQ if you need help. Support